Trial, 1622


Published

3 October 2022

Last Updated

30 March 2023

Ship

Trial (sometimes Tryall or Tryal)

Country of origin

England

Built

Possibly Portsmouth, England

Rig

Ship

Tonnage (gross)

500

Port Departed

Plymouth, England

Port Destination

Batavia, East Indies

Wrecked

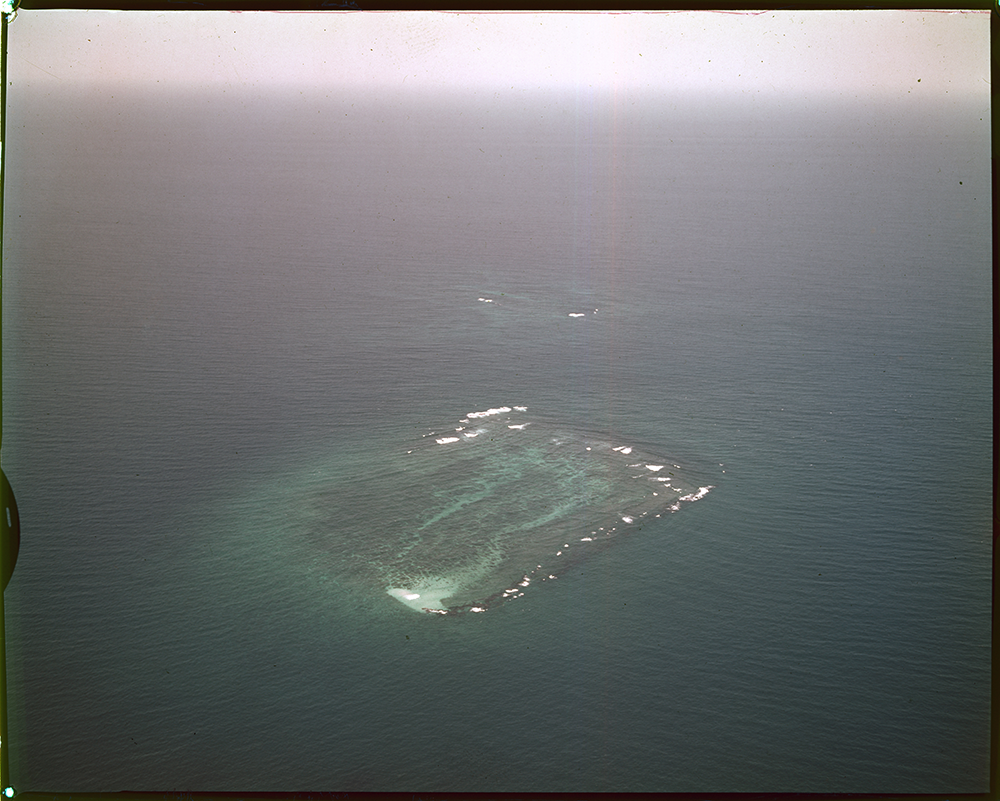
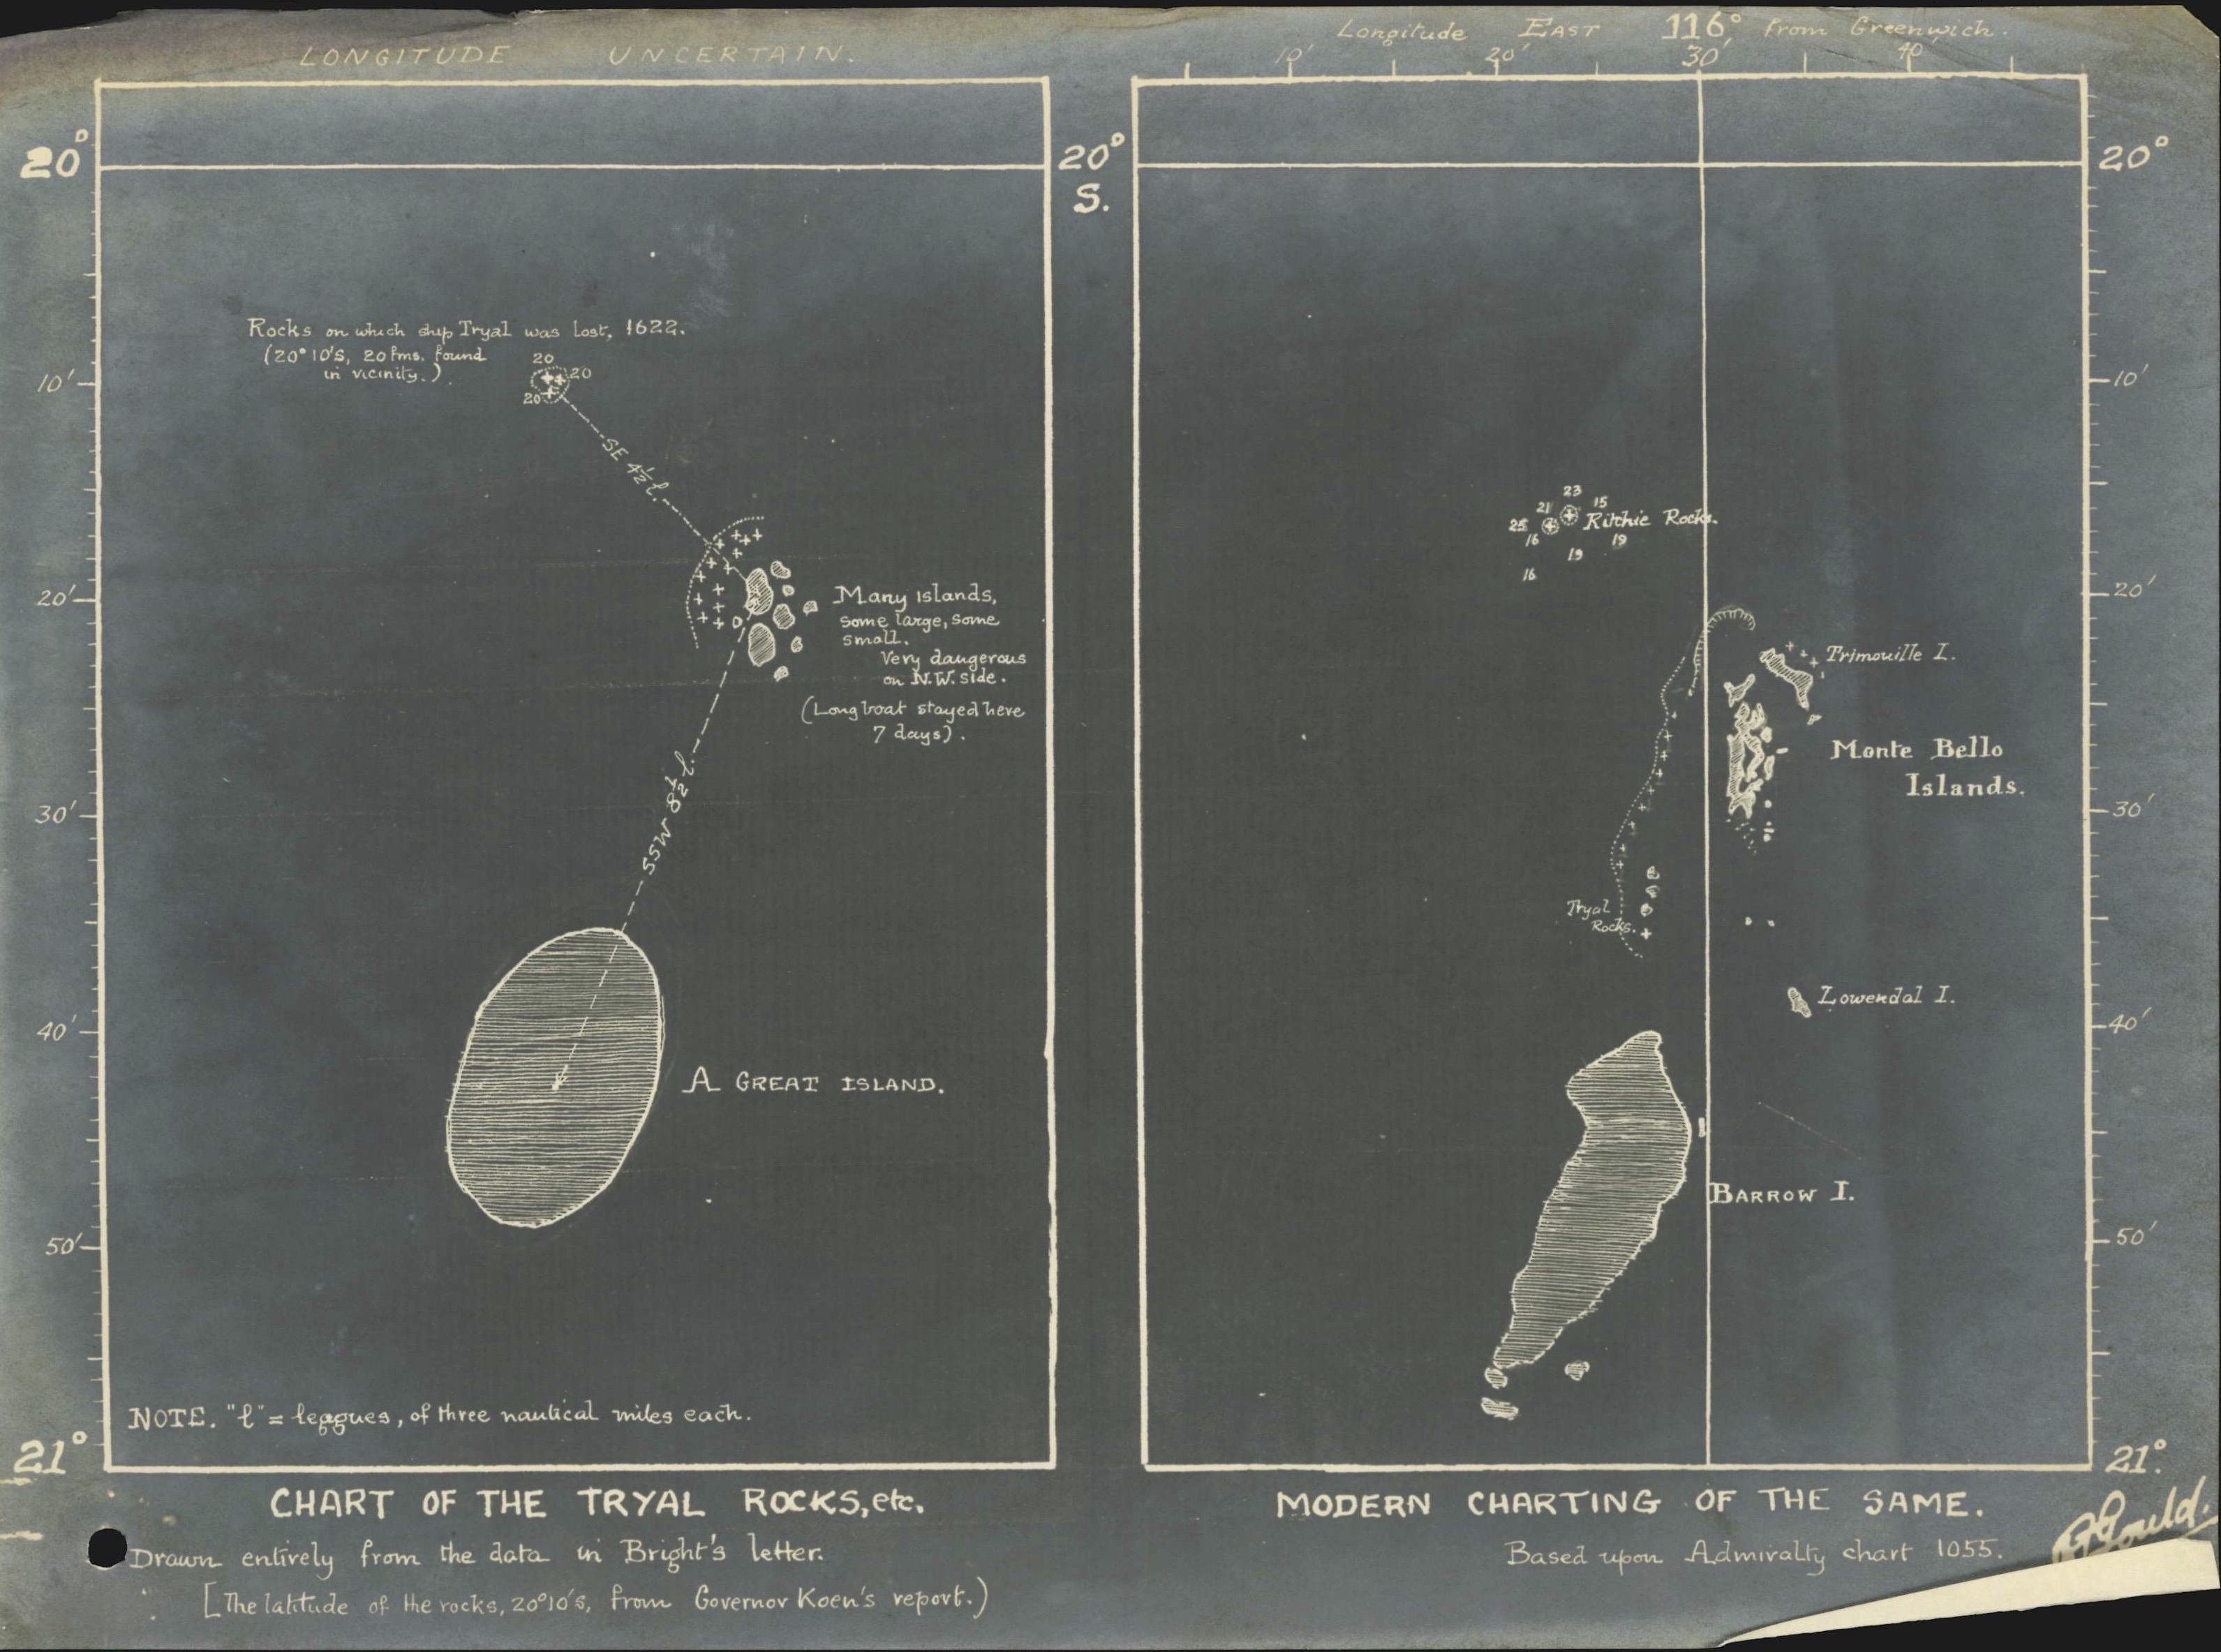
25 May 1622, Trial Rocks

Discovery

Eric Christiansen, Dr Naoom Haimson, David Nelley, Alan Robinson, and John MacPherson

Protection

Commonwealth Underwater Cultural Heritage Act 2018

History, 1621-1622

Carrying goods for the English East India Company (EEIC) and 143 people, Trial departed Plymouth, England on 4 September 1621 bound for Batavia in the Dutch East Indies (present day Jakarta, Indonesia). The ship’s Master, John Brookes had been instructed to follow the new Dutch shipping route known as the Brouwer Route. After departing the Cape of Good Hope, Trial initially sailed south before turning east to take advantage of constant westerly winds in the high southern latitudes.
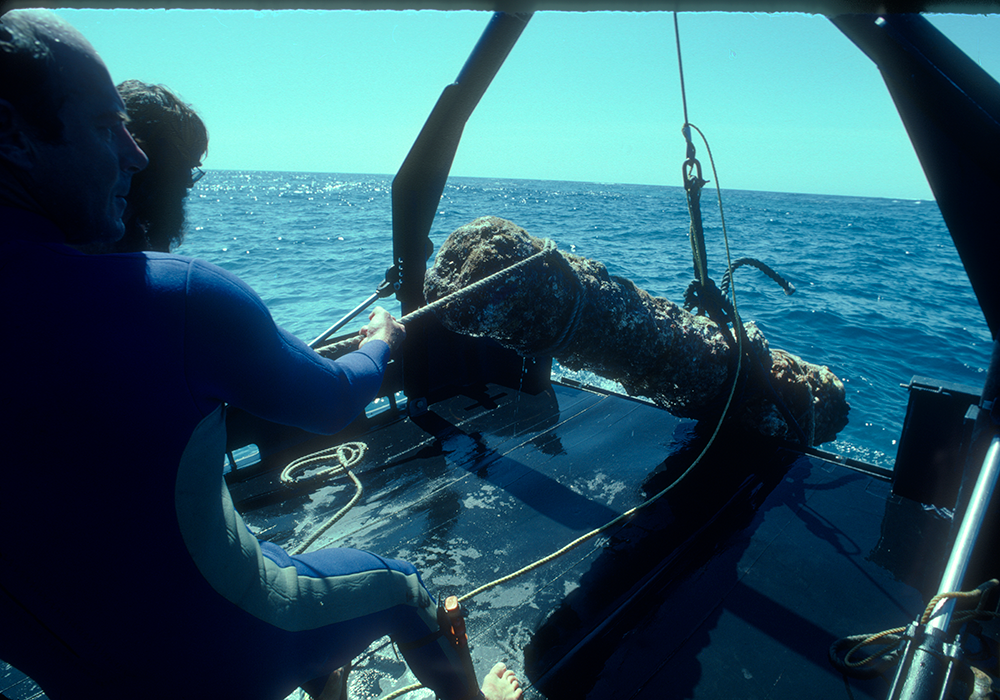
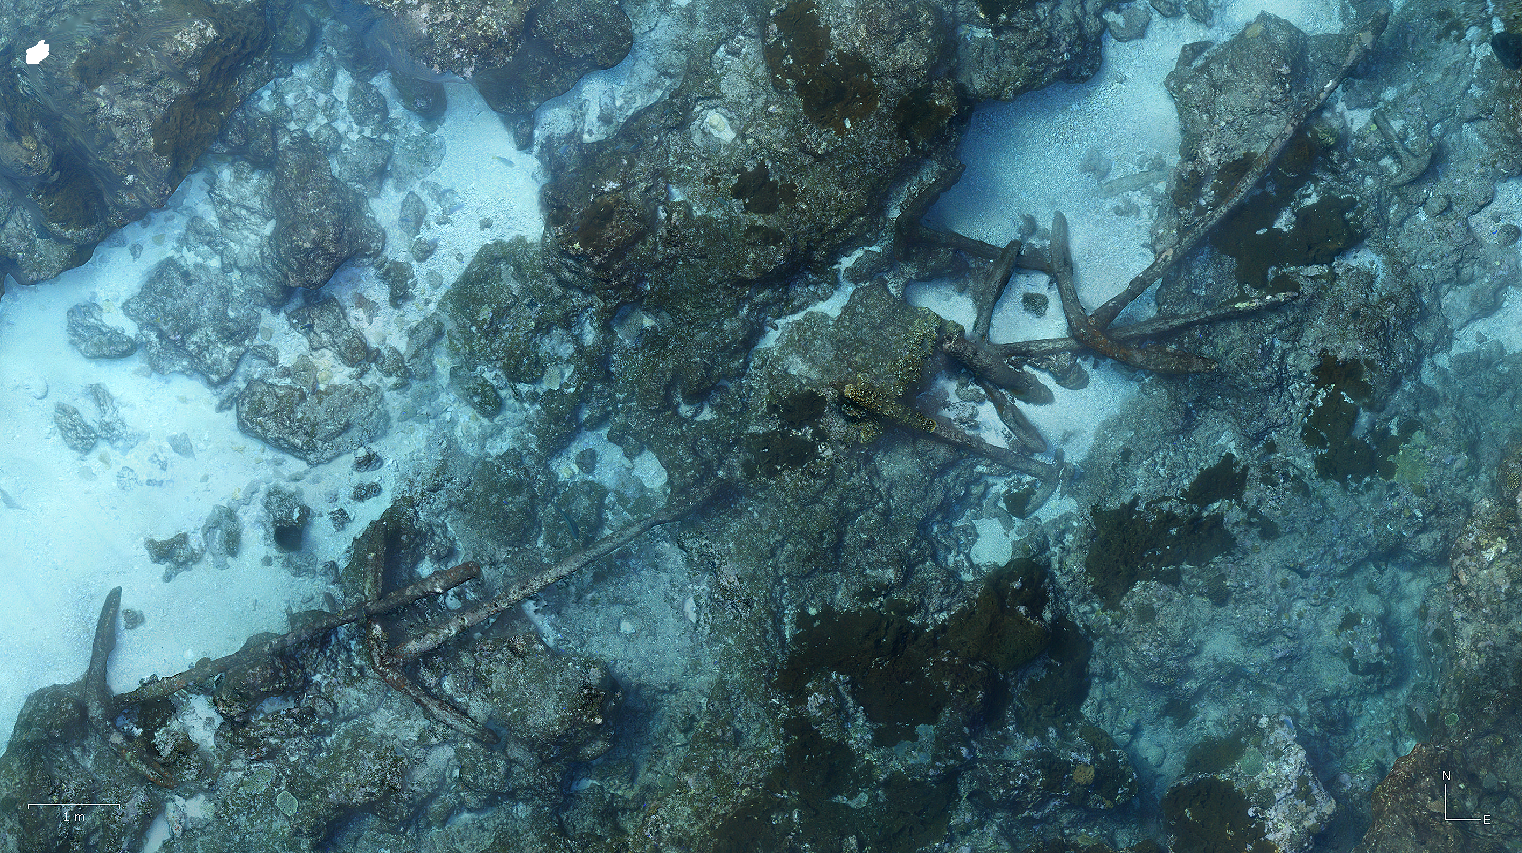
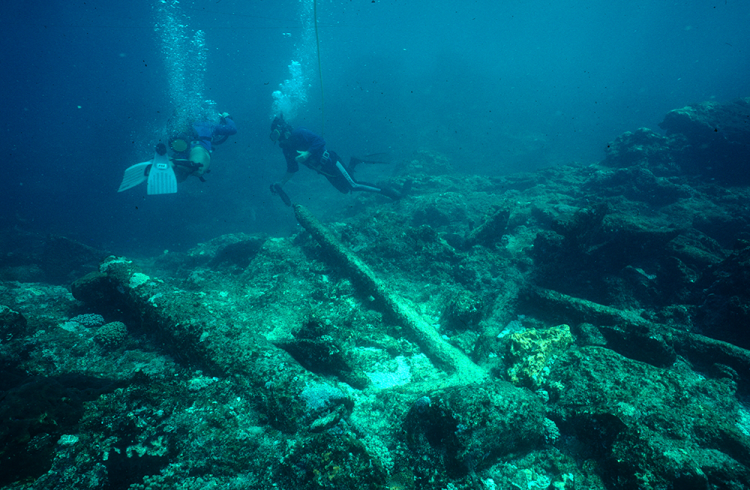
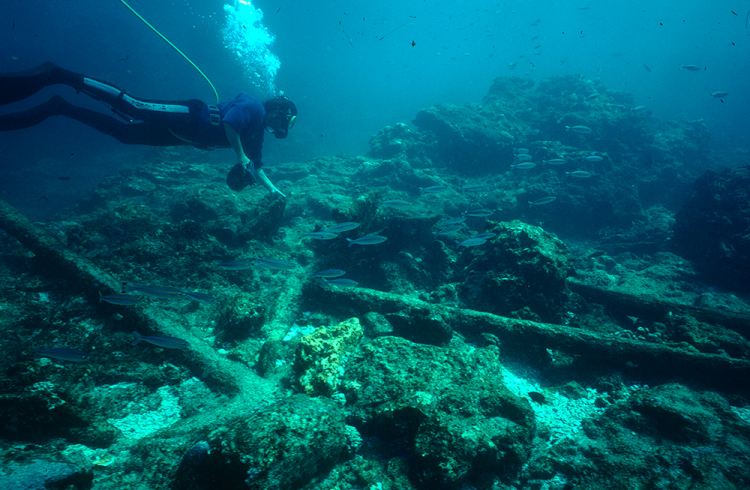
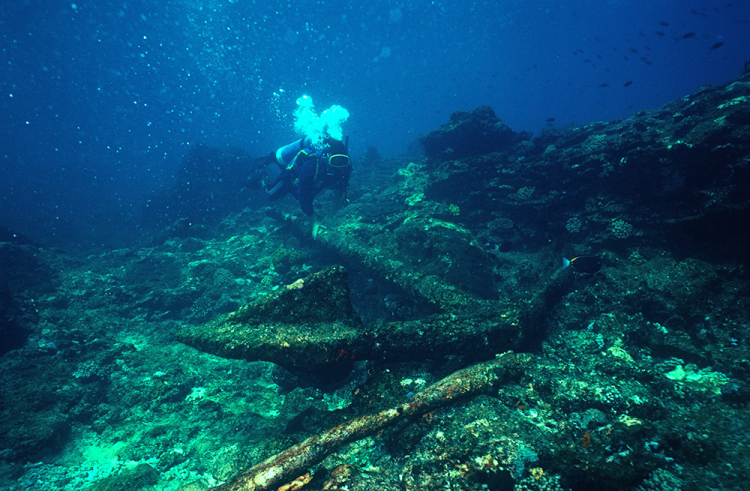
 

Shipwreck

On 25 May 1622, Trial struck rocks off the remote northern coast of Western Australia. More than 100 people drowned as the ship broke apart. Ten people, including Brookes, managed to escape aboard the ship’s skiff. Another 36 people survived on Trial’s long boat, under the leadership of Merchant Officer Thomas Bright. Both boats travelled separately to the East Indies, where Brookes and Bright each recorded their own, conflicting accounts of the disastrous loss of lives and company property.

Factors contributing to the wreck

Navigation

Captain Fitzherbert had been the first EEIC captain to take ships along the Brouwer Route. He had learned of it from the skipper of the Dutch ship Schiedam while at the Cape of Good Hope in 1620. The Brouwer Route halved the time it took to sail from the Cape of Good Hope to Batavia, and the EEIC instructed Brookes to follow the route as described in Fitzherbert’s journal.

While the Brouwer Route was faster than the previous routes, it also posed many challenges. As ships sailed the vast distance east with few visual points of reference, navigators could determine their latitude (position north or south of the equator) with relative confidence, using celestial navigation tools. Longitude (position east or west of the prime meridian), however, relied solely on dead reckoning – location determined by visual observations of land masses and unreliable measurements of distance, time and speed. With no exact way to calculate how far east they had travelled, navigators had to successfully judge when to turn north to reach the East Indies, or risk being wrecked along the still largely unknown, Australian mainland and offshore hazards. 

On 25 August 1622, a month after arriving in Batavia, Brookes wrote to the EEIC reporting that he had dutifully followed Fitzherbert’s journal. He claimed that Trial had wrecked on rocks that Fitzherbert’s convoy of ships must have narrowly avoided. A mishap, he noted later, that could happen to even the most skilled mariner. A short time later, Brookes was given command of another EEIC ship, Moon.

Negligence

Brookes was not the only survivor to provide an account of the wreck of Trial. In a letter to an EEIC official, written from Batavia and dated 22 August 1622, Thomas Bright accused Brookes of negligence and identified his incompetent navigation as the sole reason for the wreck. Bright also accused Brookes of theft of EEIC valuables – money and ‘spangles’ – that were aboard Trial.

There is no record of any actions being taken by the EEIC in response to Bright’s letter.

Deception

Over 300 years later, research into archival records of the EEIC, revealed that Brookes had provided misleading information in his letter to the EEIC. It appears he falsified the ship’s logbook to corroborate his version of events that Trial was on the instructed course when it struck the rocks.

Brookes’ deception placed the Trial Rocks further west of their actual location and due south of the Straits of Sunda. This was the longitudinal location at which ships on the Brouwer route were supposed to take a north, north-east heading to reach the East Indies. Using the information supplied by Brookes, the EEIC and the Dutch East India Company attempted to find the Trial Rocks and the wreck of Trial. Not surprisingly, all attempts to locate the wreck were unsuccessful.

Plate 34 from The English pilot, the third book, 1701. This map shows the Trial Rocks located further west than their true location.

Plate 34 from The English pilot, the third book, 1701.
This map shows the Trial Rocks located further west than their true location.
Image: State Library of Western Australia, MAPR0000002

A Master in disgrace

Brookes’ story didn’t end with Trial. In September 1625, while on its homeward voyage from the East Indies, Moon wrecked off the coast of Dover, England. Brookes was charged with negligence and purposely wrecking the ship. He was imprisoned in Dover Castle for several months ahead of the trial.

The case against Brookes dragged on for several months. Eventually, on 26 September 1626, the charges against Brookes were dropped and he was released from the employ of the EEIC.

Discovery, 1969

Aerial view of Trial Rocks, taken from northeast

Aerial view of Trial Rocks, taken from northeast
Credit: WA Museum

Australian historian, Ida Lee was researching Trial for an article that would be by published by the Royal Australian Historical Society in January 1934, titled ‘The first sightings of Australia by the English’. During her research, Lee uncovered letters written by both Brookes and Bright relating to the loss of Trial and she sent extracts from the letters to Rupert Gould at the United Kingdom Hydrographic Office. In 1928, Gould wrote back to Lee with the correct location of Trial Rocks, which he determined from the evidence given in Bright’s letter. He was quick to dismiss the account from Brookes.

Map on the left is rough spatial sketch and the map on the right, is an accurate chart of the islands.

Maps drawn by Rupert Gould, comparing the descriptions in Bright’s letter to the Admiralty chart of the area.
Source: UK Hydrographic Office

The Admiralty charts were updated in 1935, to identify the true location of Trial Rocks. For unknown reasons, Lee did not refer to Gould’s findings in her 1934 article, but her publication of the Brookes and Bright letters would guide the later research of Eric Christiansen and John MacPherson.

Christiansen was a keen diver and member of the Underwater Explorers Club (UEC). He became interested in the wreck of Trial after the 1963 discoveries of the Dutch East India Company ships Gilt Dragon and Batavia along the West Australian coast. He engaged MacPherson, a historian, to assist with the research. After reading Lee’s article, they obtained copies of the letters written by Brookes and Bright which opened new avenues for inquiry.

After extensive research, MacPherson presented his findings in a written report to the UEC in 1965. Christiansen was confident they knew the location of Trial Rocks. It wasn’t until 1969, however, that an expedition to visit the rocks and search for Trial could be funded.

On 3 May 1969, Christiansen, along with Dr Naoom Haimson, David Nelley and Alan Robinson discovered a concentration of cannon and anchors on the southwestern side of Trial Rocks. Believing it to be Trial, Christiansen and Haimson notified the WA Museum of the group’s discovery.

Diver on the Trial wreck site, 1985

Diver on the Trial wreck site, 1985
Credit: WA Museum, TRA_115

WA Museum expeditions, 1969 – 2021

1969

Following the discovery by the UEC team, the WA Museum attempted two expeditions in 1969 to verify the identification of the wreck site. Bad weather conditions severely limited what could be achieved. With only 5 hours of dive time in 27 days, the team managed to recover ballast stones and a broken anchor crown.

Broken anchor crown recovered in 1969.

Broken anchor crown recovered in 1969
Image: WA Museum, TR340/TRO_01

1971

The expedition of June 1971 was sponsored by M. G. Kailis, managing director of Gulf Fisheries. The team was made up of staff from the WA Museum and members of the original discovery team. The purpose of this expedition was to survey the site and conduct a feasibility study for future excavation. 

Black and white underwater photographs were taken to construct a photomosaic of the wreck site. Conditions underwater made it difficult to capture the overlapping vertical photographs required for photomosaics. The heavy surge from Indian Ocean swells could carry the photographer up to 25 metres away from their starting point.

It was at the start of this expedition that the team observed the site had been recently vandalised with explosives, damaging the reef and some of the anchors and cannon. They also observed there were almost no small artefacts on the site.

Photomosaic of the Trial wreck site from the 1971 expedition

Photomosaic of the Trial wreck site from the 1971 expedition. Created before digital photography, this was made by cutting and gluing printed copies of black and white photographs on to a board.
Image: WA Museum

Hand-drawn site plan of the Trial wreck site, traced from the 1971 photomosaic.

Hand-drawn site plan of the Trial wreck site, traced from the 1971 photomosaic.
Image: WA Museum

1985

In 1985, the WA Museum sent a team to Northwest Island for a six-week survey of the Trial wreck site, looking for further evidence to support the identification of the wreck as Trial.

Another photomosaic and site plan were created. These clearly showed changes to the site since 1971. Large rocks that had fallen into the site from the explosives had moved off the site, positions of cannon and anchors had changed slightly, and gravel and rock movements had occurred. 

To facilitate further research into the identification of the ship, the best-preserved cannon on the wreck site was recovered. The cannon was transported to the WA Shipwrecks Museum in Fremantle, where it underwent four years of conservation treatment. Examination of the cannon confirmed it was most likely an English gun from the 1600s. 

The team concluded that light-weight artefacts were forced away from the site by the extremely strong surge caused by storms or cyclones in the area. This was supported by the observation of a trail of stone ballast to the northeast of the site. The stone ballast was another piece of evidence to help confirm the identity of the wreck as English, since Dutch ships typically used bricks as ballast.

Bringing the cannon aboard the workboat.

Bringing the cannon aboard the workboat
Image: WA Museum, TRB_727

2021

There have been ongoing questions about the positive identification of the wreck site as Trial, due to the lack of artefacts that could positively identify the site as an English East Indiaman, and the possibility of other wrecks existing in the Trial Rocks area. In March 2021, the Museum commissioned an aerial geophysical survey to be flown over Trial Rocks, which was funded by Mr John Rothwell AO, Foundation for the WA Museum, Minderoo Foundation, and the Commonwealth Underwater Cultural Heritage Program. The survey was the first step in a project to eliminate the possibility of another East Indiaman wreck in the area. Analysis of the data resulted in 16 magnetic targets being identified for closer inspection.

Between 3 and 13 May 2021, WA Museum maritime archaeologists travelled to the Montebello Islands and Trial Rocks, as part of the Disney+ ‘Shipwreck Hunters Australia’ documentary series, in conjunction with Terra Australis Productions and VAM Media. They conducted an inspection of the Trial wreck site and the 16 magnetic targets identified from the aerial geophysical survey.

During the inspection of the main wreck site and two of the targets, new anchor fragments were found, along with further cannon and ballast stones. Following the wreck plume, a relatively intact lead deck scupper was found and recovered. All the remaining magnetic targets were inspected by divers, or using multibeam echo sounder or remote operated vehicle. They were found to be geological, eliminating the possibility of other comparable East Indiamen wrecks in the area, further supporting the identification of the wreck as Trial.

The positive identification of the wreck as Trial is supported by:

  • Location: Trial Rocks, formerly Ritchie’s Reef, has been positively identified as the location Trial wrecked, as described in Thomas Bright’s account. 
  • Wreck site layout: While there are more, and some larger, anchors than required for a 500 ton ship of Trial’s size, their context and distribution are consistent with a single wreck site, and site formation processes, based on prevailing swell and currents. It is possible (though not historically documented) that Trial was transporting spare anchors for use by English East India Company ships in the East Indies.
  • Country of origin: Cannon and ballast recovered from the wreck site support its identification as an English ship.
Digital site plan of the main Trial wreck site created in 2021. Similar to a photomosaic, making this plan required hundreds of overlapping underwater photographs of the site. Whereas photomosaics require top-down images, this 3D model needed photographs from lots of different angles. The images were combined and digitally processed to generate a 3D model, which was then geometrically corrected and projected to create this plan view, known as an orthophoto.

Detail of digital site plan of the main Trial wreck site created in 2021. Similar to a photomosaic, this plan was produced using hundreds of overlapping underwater photographs of the site. Whereas photomosaics require top-down images, this 3D model required photographs from many different angles. The images were combined and digitally processed to generate a 3D model. The model is geometrically corrected and projected to create this plan view, known as an orthophoto. The result is a highly accurate plan of the site.
Credit: WA Museum

Learn about the other wreck sites featured on 'Shipwreck Hunters Australia'.


Conservation and care

It took four years of work by the Museum’s Materials Conservation team to conserve and stabilise the cast-iron cannon recovered from the Trial wreck, before it could be put on display. A replica gun carriage, consistent with the type used at the time, was designed and constructed by the Museum’s Technical Officer Geoff Kimpton to support the cannon.

Visitors to the WA Shipwrecks Museum in Fremantle can see the cannon on display.

Raising the cannon

Inflatable lift bags were used to raise the cannon from the seabed to the surface, where it was winched on to a workboat.

Inflatable lift bags being used to raise a cannon from the seabed to the surface.

Image: WA Museum, TRA_73

Transporting the cannon

A crane was used to transfer the cannon from the workboat to a truck bed. For transport from Dampier to Fremantle, the cannon was wrapped in wet cloth and black plastic to prevent it from drying out. To protect artefacts that have been removed from the marine environment, it is important they are kept wet until they can be treated and stabilised by professional conservators.

Recovering parts of the Trial at the wreck site

Image: WA Museum, TRB_891

Removing concretion

Cannons exposed to the marine environment become covered in corrosion products, along with sediment and seabed materials that become attached. This mass is known as concretion. A thick layer of concretion was removed from the exterior and interior of the cannon. Traditionally, hammer and chisel are used to crack the hard exterior of the concretion and facilitate its removal.

The team experimented with a new technique for removing concretion by cryogenically treating the cannon with liquid nitrogen. The intention was to make the concretion more brittle. It was moderately successful for removing thinner concretion, however thicker concretion still required traditional percussive removal methods.

Inspecting parts of the recovered Trial wreck

Image: WA Museum, TRC_46

Caustic soda bath

After the concretion was removed, the cannon was treated in a bath of caustic soda to prevent further corrosion. In the bath, electrical current is run through the cannon and metal sheet anodes. This dried out the chlorides (salt) and reduced the surface volume of the corrosion products. The newly exposed cannon surface becomes porous, allowing the salt to come out. This long process is generally about one year in the bath, per hundred years immersed in seawater.

Moving parts of the Trial wreck

Image: WA Museum, TRC_76

Protective coating

After the long caustic soda bath, the cannon was soaked to remove any residue and dried. To finish, the cannon was coated in a rust inhibitor and then submerged in a giant tank of molten wax for a few days. The hot wax enables the air in the porous cannon surface to come out and then later as it cools, the wax is drawn into the surface, consolidating and strengthening it. Finally, to protect the cannon from dust and fingerprints, it was coated in shellac.

Trial gun

Image: WA Museum

Departments

Maritime Heritage

Keywords

Shipwrecks