Meet the Museum: Making for Museums
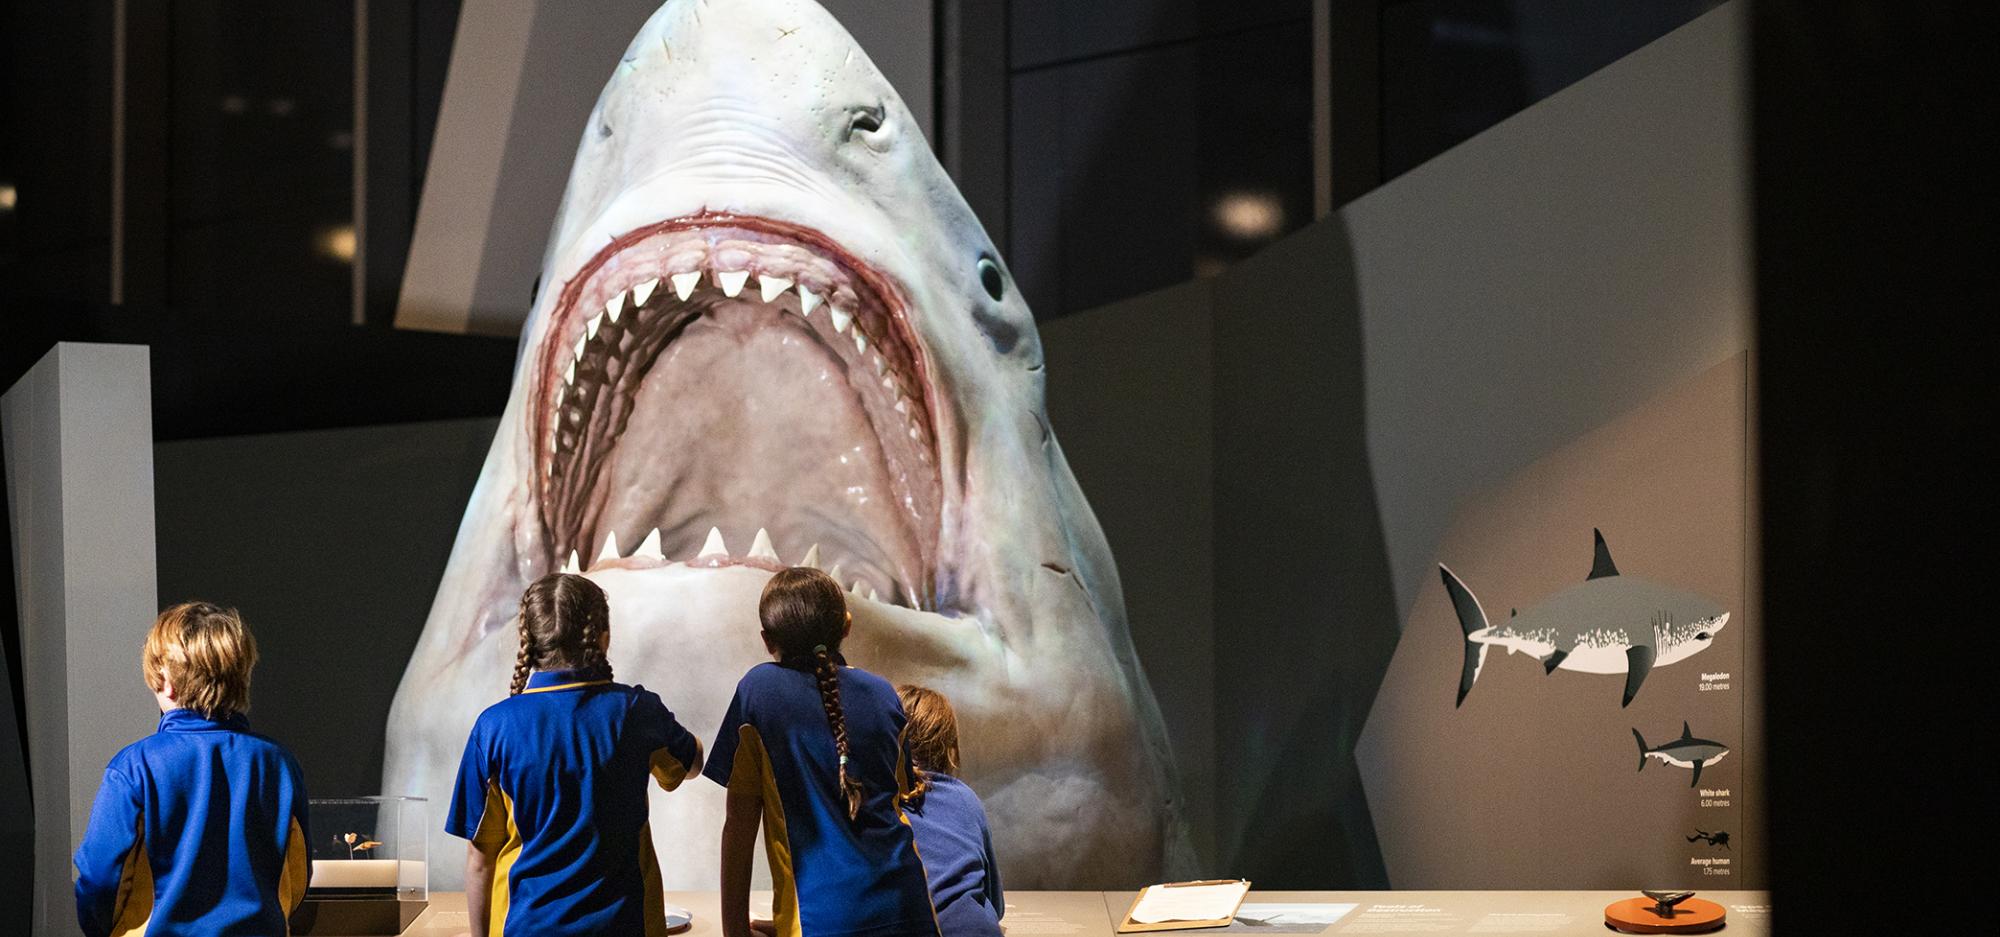
Ever wondered who crafted our awesome Megalodon? Meet the makers of this exhibition icon and explore all the incredible models by CDM:Studio.
Join us for an exclusive insight with Production Lead, Jason Kongchouy, as they share the fascinating process behind creating over 130 unique pieces, including ancient marine life, towering dinosaurs and intricate termite mounds, and discuss similar projects undertaken for other prestigious museums across Australia.
CDM:Studio combines a scalable fabrication pipeline with traditional studio skills and techniques, working in close collaboration with WA Museum researchers to ensure each model is highly accurate and engaging.
Meet the Museum
Are you curious about the fascinating world behind the scenes at the Museum? This monthly program delves into the less visible parts of the Museum's work, as scientists, researchers, historians and curators share their expertise and passions.
-
Episode transcript
[Recording] You're listening to the Western Australian Museum Boola Bardip talks archive. The WA Museum Boola Bardip hosts a series of thought-provoking talks and conversations tackling big issues, questions and ideas. The talks archive is recorded on Whadjuk Nyoongar Boodjar. The Western Australian Museum acknowledges and respects the traditional owners of their ancestral lands, waters and skies.
MC: For this month's Meet the Museum, we are delighted to welcome one of the team responsible for many of the amazing objects we're surrounded by this evening. Hence why we are holding this talk in the wildlife gallery here at Boola Bardip. So Jason Kongchouy is the production lead at CDM studio, and CDM studio is a Perth based creative model making and fabrication workshop.They use a scalable fabrication pipeline coupled with traditional studio skills and techniques, making CDM versatile across a wide range of disciplines, materials and industries. And Jason will be covering how they designed, built and delivered some of the 130 objects in this gallery, but also beyond this gallery also. So I will hand over to Jason. Thank you very much for joining us.
Jason Kongchouy: All right, thank you Cecily. Yep, so as she's introduced, my name is Jason. I'm production lead at CDM studio. We are a workshop based in Perth, Osborne Park, and essentially we're model makers. If people ask what I do for a job, we make and fabricate things for clients and customers, one of them being the museum. And yeah, I'm just going to take you on a journey, through the many stories of some of the different objects we've made here in this gallery before us. And, we'll go from there as we go. So coming on forward. Yeah, so as Cecily’s already touched on, we’re a model making workshop in Osbourne Park. When I say scalable digital, scalable direct digital manufacturing pipeline, what that talks about is what we do is as a pipeline for making things, we always start off with, well traditionally you start with a clay object like a clay sculpture. You make moulds, you make fiberglass shells, and then you do all these steps. We always start from a digital, like a digital pipeline. So we make 3D sculptures for a lot of the, I guess, the animals, the dinosaurs, some of the things that you'll see on the tables as I go through. It starts as a 3D file, which we then can do a lot of things with it. We can either send it to 3D printers, our C and C machines. We can send to a VR AR program as well. So we do a whole bunch of things, but it all starts from the digital asset. So, and then whilst we do have that digital pipeline on hand, like we do a lot of stuff with Rhino and Sal works and 3D sculpting, we still have, I guess, a traditional craftsmanship background. So a lot of people do mould making. We have artisans who are really good at painting. So it's still a physical, collaborative effort where we make things, but it's just overlaid with this other pipeline that just makes it much more easier on us, so we can focus on making things the best they can be for the customer. So, going through. So the first thing we made, so you may have seen around the corner, we have these dinosaur track replicas. So these are all footprints that the scientists found up in Broome of just dinosaur footprints of a whole bunch of different species. And the museum wanted pretty much those footprints on show here because that's the theme of the gallery. I guess the whole thing of the museum is giving you a taste of all the different biodiversity and things that link to all over the all over the state, but bringing it all here so you can, like, experience it and maybe get inspired to go up there and see them for yourself someday.
So, the Museum wanted these footprints on a wall for people to appreciate. So to start that off, they gave us these footprint castings. So the scientists up there found the footprints on the ground. They took moulds of those footprints in the ground and took castings of them and gave those castings to us. We couldn't put those castings on the walls because they wanted it out of a very specific material. They wanted it to look a certain way, and they had needed it to, like, essentially clip on to the sort of the display. So you can see Marion here. So what she's done is she’s taken those footprints that the museums provided us. There's like nine total. We then took them, place them on the table and put clay around the edges of them all, because this is us making a mould. So once we clay up the pattern. So it has sort of this, sort of this, like, thick wall return, we can then pull silicon around it. Here's a much younger version of me. So you can see here we've put, this sort of black plastic around each of the footprints, and we pour the silicon in, essentially making a silicon mould. You can see here, from that silicon mould, yeah, we can pull it out. And you've got pretty much the opposite of the footprint that you want to have. Placing it back here, yeah, so that's the original footprint. This is the mould. So now that we have this mould, we can cast anything we want into it. So we take that mould. If I click through, Come on. Yep. So what we've done is we've cast in a very special substrate called A1. It's kind of like a sort of acrylic modified plaster. We've tinted it up and then, yeah, we poured it into these moulds and out pops pretty much a copy. And that you can then put like, we put like special clips in the back so they can hang on the walls. And then it goes here, that's Richard our artist, who then art works it up to make it a little bit more realistic. And then, yeah, it's really cool. So now you can see that we've got all these footprints, as you walk around the gallery, you've got all these footprints hanging on the wall, and that's how we've been pretty much able to make replicas. And you can see him, he's painting in the little muscles there. And also there’s this little small trick, I don't know if it's still shows, but like, we've got salt, put it into like a hot water kettle and sort of poured it onto the fossil. So when the water evaporates it sort of leaves like a salt residue, giving you that little bit more real realism to it. So yeah, that's really, really cool. And then you can see that there on the gallery there. So all that, so those are all copies. Pretty much 1 to 1 copies of what's up in Broome now, but on show for people here to appreciate.
The next section. So a lot of what we do is making models. One of them was the Therapod here, the Megalosauropus broomensis. As I was saying before, we start with a 3D, pretty much with a 3D sculpt with a lot of our objects. So the museum engaged a paleo sculptor who, Vlad Konstantinov. So he's a sculptor from Russia. And what he does, he takes all the reference material where it's like pictures of the fossils, information from scientists, and he makes a 3D, pretty much a 3D file on a computer. A 3D sculpture, actually, of that thing of what the best interpretation is. And what's great about that is you can take that 3D file and you can send it to experts all over the world to get them to check it, like, oh, does it look like this? Like, oh, I guess it would have it would have these proportions. And essentially that's sort of your reference starting point and that's great. So we then can, what we can do as a studio is we can take that file and go, like I said, do a number of different things. But for this one we could take it to a large format 3D printer. So we have a really big SLA 3D printer which uses resin. You may have seen 3D printers that have like a sort of spool of plastic and squeezes it out. This uses special resin that's cured with the laser and allows us essentially to make, think of it like a big Lego toy that you join together. So, you can see there, to fit it, to get it to the our machine, we've had to sort of cut it up into different sections and glue it together as we go. And then after that, essentially there's a there's a big jump to where we got to now. But essentially, once it's assembled and joined together, our artists, we've got James who's one of our key painters, he can work it up to match the reference provided by the paleo artist from before. And then same thing again. We have Stegosaurus just around the corner. Again, a really beautiful piece. Here you can see some of the digital work we do. So this is a 3D file. And you can see the different the different colours, how we've sliced it up to fit onto our machine. So you've got, you know the spines come off, this head comes off, the legs, it essentially becomes a big kit that comes back together. And you can see it there slowly coming together in bits. So again, so right now, traditionally a lot of people with a lot of places that used to make dinosaurs and probably still do today, they would start from a clay sculpture, which is great because that's how you make a physical object. But then from that clay sculpture, they will then have to make a mould of it. And from that mould they will then have to make castings. And from those castings they'd have to assemble it, and from that they'd have to then, it's like pretty much it's adding all these physical processes that's become really, really exhausting. And for us to adopt 3D printing and sort of this digital pipeline, it's what allows us to be able to make, well, we had like 130 things to make here. If we didn't do that, we wouldn't be able to keep up with the demands of opening dates and just be able to keep up pretty much. So yeah, so being able to 3D print it takes a lot of that strain off our artists and our craftsmen to focus on the key bit, which is you know, assembly and painting and making it make it the best it can be. So if you go across here, yeah, yeah, once it comes all together, it starts to take shape. You can see it's really high detail. All that's done by the machine, the machine has or it's driven by the 3D sculpt, which is what drives the machine. The machine is just printing what's sent to it. So the 3D sculpt is really high definition, high resolution. That's what comes out. And again, with that, what's great is when it's sent to the scientists or to the experts. Yep. This is what it looks like. This is exactly I approve this 3D file. That's exactly what comes out the other end. So that's another really big, I guess, benefit of 3D printing. And then in terms of what we do. And then again going across. Yeah. James again just painting it, that's a really good photo of him. And yeah, and there it is in our gallery. So you've got the footprints, the stegosaur, the therapod. So that's the way it comes along. So whilst that was done with SLA 3D printing, which is using the resin, we did make some bigger large dinosaurs, which you can see hanging just around the bend there. Those were made with our bigger machine, which is our bigrep one. Essentially is a big filament machine. You can see there's a big spool of plastic that goes into this little bit at the end here which heats it up and squeezes it out like a piping bag and builds the object. So you can see that it's forming sort of one of the snouts.
What's great about that is, whilst the SLA machine is really good for like, you know, much more height, whilst it’s great for high detail, structurally it's not as strong. Whereas the bigrep and the filament ones allows us to do a bit more engineering, sort of structural work with it. So you can see here with one of the hanging dinosaurs, we were able to take the original sculpture, which is from the museum and model in this sort of like, I guess, peace symbol, which allowed us to put the box metal in. Traditionally to make a sculpture and then try and get that to go in is really, really, really difficult. Being able to do it digitally on the computer beforehand and pre-nominate where things go and where it finds up, allows it to be much more efficient. So when it gets to the hands of the person on the floor all they have to do is like, oh, I just have to join this and slide the box metal through. It's a much more cleaner pipeline in terms of being able to get to the final object faster, if that makes sense.
Then same thing with here. We've got the, this is the trapezium ammonite. So whilst we did use the filament because it's like a structural thing, which we got certified by an engineer from Peritas Engineering, they certified all the dinosaurs. We sent them drawings of, yes we'd like to hang some dinosaurs. The other thing that they look at is like building suspension bridges and that. So we were able to model in, you know, this is where the box metal goes, this is how we want to hang it, this is like the chamber for drilling reinforcement. The head of this was done with the other machine. So the other machine gives you a higher resolution, so we use that for what it's for. And we can merge it with the, you know, the filament machine to give it that structural integrity to be able to hang it in a public space. Come across I think that was the third one. Yeah. So whilst the filament machine is great it does need a lot of cleanup. So you can see here, one of the plesiosaurs, once it comes off the 3D printer, the filament one at least, we then have to cover each one with resin and do a lot of sanding and post-processing work to make it look nice, get it smooth, and to make it look like how it should. Especially, you can see all the different pieces. Again, you’ve got to glue it all together, whereas with the other machine you don't have to do as much cleanup. There's is still, you’ve got to do the seams. But with the filament one you got to clean everywhere because it leaves these, you might see it on these pieces later, these sort of little build lines, because it's just the nature of the, I guess, the manufacturing process. You can't get away from it. So the resin helps you hide those lines, as well you’ve then got to sand it after that. And then, yeah, from there, once it's assembled it goes to our paint team. So that's Rex again, another local painter. They took charge of the Ichthyosaur here. You can see here, so again, that's a picture of the Z brush or the 3D file that someone's coloured in, and we use that as paint reference. And that paint reference has been based on, you know, approved by the museum scientists or whoever's the expert on this specific mammal. Yeah, we just follow that. So that's a great guide and then, yeah, we try and realise as best we can using real colours and on site lights and all that kind of stuff. This is the trapezium ammonite zoomed up. Yeah, so that 3D print, you know, James, I think he did this one. He put all the patterns in to make it look more lifelike. Coming across, and there's James again, painting out the ichthyosaur. It was a crazy time. And then you can see that the eyes are gone. So what we do is whilst we print all the other main pieces, the eyes we make separately. And you can see an example of one there. We cast them out of resin and do a separate process, and we put them in later. And then, yeah, you can see up here again, that's the 3D file reference that we were using to guide the paint job.
Coming through and here's us installing at the museum. Again, it takes quite an effort. But essentially you can load onto a truck, take it to the gallery. That one's that one hanging up, so that came out really, really nice. Here's Trish, the former director of the new museum project. I think they came to the studio with Channel Seven to have a talk about what we're doing. It's also, it's a really good photo of the Icthyosaur next to it there. Or the Plesiosaur, sorry, next to it. Coming through, ok installing it. So we had a really good relationship with Kilmore Group. So they're like, they do a lot of facade cladding and installs for a lot of construction companies here in Perth, and we just have a really good relationship with them. So they were the ones helping us hang things in the gallery here. And yeah, they’re just around the corner and they look really, really good.
Now whilst we have those big models, you know, the dinosaurs and the hanging ones over there, we also use the SLA 3D printing machines to make even smaller things. So there's quite a few, like at least 100 different things that we've printed from the machine that we've done a lot of things with. This is a soldier termite here. You can see that's probably in the termite mound that's over there now. It's in the, [comment from unknown person] Exactly. It's in the caves, the kids can duck in and you can have a look. So what's great is, again, all these are driven by 3D sculpts that we could then send to the printer and whatever, whatever has been approved as a 3D file is what comes out the machine at the end. The rest of it is just us painting it up to look as best we can, like the real thing. So you can see here, this is one of our machines here, yeah. So that's what it's all looks like when it's doing its thing. So you’ve got this tray of resin at the bottom. This sort of bed comes down, a laser shoots it and it builds it layer by layer, upside down as it goes up. Coming across. Yep. So, that machine in particular allows you to do really, really fine ornate detail. So here's like a tiny I think crawfish, that whisker is like maybe like half a millimetre across. You'd be hard pressed to try and do that by hand any other way. I think like being able to do it with the machine, which could build that for you, is a is a godsend and allows us to make things that you couldn't make any other way honestly. We did, mind you, we did like print like ten and maybe like three survived. So it was more of like, someone will get through because it was just like, yeah, they asked us, we want it this big. But thing is when you, when you sign off on something this big, it makes the tentacles like, you know, the antennae that big. So it's sort of a fabrication challenge along the way. And that's a 20 cent coin for reference. And then yeah, so you can see over there, in Relics and Refugees, there's a whole bunch of oversized insects. Stygofauna I think, they're these sort of like ghostlike insects that you find in the waters of the limestone caves, down, sort of like, Margaret River way. Those were all made with the SLA printer. So 3D sculpted all the pieces, so that whilst it looks nice now, all these were itemized off. So we took each leg off, took each antenna off, and then we had to glue together like a big ornate kit.
So while 3D printing is all well and good, it's still requires us to do that model making step. The museum's not engaging us to, we're not buying a 3D print from KDM. They're buying a finished museum object, which is what we do essentially. So it still requires us to be very, very careful with superglue and then sort of build it as we go. And yeah, so you can see there, I think it was like 12 different insects for that region. These are really, really cool. So with a lot of the sculptures we have, a lot of the digital sculpting we do, well for this job, we consulted the WA museum scientists. I think we had, who do they have here? They have Doctor Nikolai Tatarnic, whose specialisation is just these things. And I was very disappointed when I went down to Margaret River because I thought like, no, I thought they were like this big. Turns out they're like that big. And so I was very disappointed when I went to the cave and was like where is this giant spider I'm looking for. So yeah. And it's a really cool way to, again, to scale that allows people to appreciate them. Things that you’d probably miss or not even know that existed. And then, yeah, part of that, so whilst we had that we had a whole bunch of smaller models.
This one is interesting. This is a wasp which, had an orchid, was attached to an orchid. All these hairs are little bits of a paintbrush that we've clipped off and hand glued on one by one. So we have Marianne, who was very, very patient, was able to make that really, really nice. And it's just again, it's about scale. Ordering things that big, you sort of have to like, be very, very, very careful as you go. It's actually much easier to make the large dinosaurs than it is something about that big.
So again, we made a whole bunch of different animals. Some was obviously frogs. But an interesting thing with the frogs, whilst the museum asked us to make, you know, the animals at 1 to 1. So make a thing of frogs. Sometimes they ask us to do other things with the object. So with the frogs, one of the zones over there, you can touch them and they make a sound. So part of that is, that means that we need to make some frog buttons. So with the same prints that we painted up and put in for people to look at, we were able to make moulds of them as well. So we put them into little cups around which we could pour silicon and then make sort of this silicone glove mould here that you can pour anything into. So for these, we had them cast in a kind of, it's, it's resin with iron powder in it. So the, the iron powder sort of mixes in with the resin, essentially making you an iron frog. So the company that we were working with was able to hook up the electronics underneath, so when you touched it, it acted as like a capacitive button. So it allows you to get a little conductive charge through it. It doesn't electrocute the person, it just allows you to activate the sound underneath. But yeah, that's an interesting way that whilst the same 3D asset it can do a lot of things. So you can take 3D file and print it, and that's the object itself. Or you can take a mould of it and make it into much a much more interactive, robust, element for the gallery.
So, I think there's quite a few things. There's like a whole bunch, there's like skulls, there's like this giant turtle frog that you can see over there. Made out of like a squishy material because the scope was those had to be, like, touchable when your kids in school holidays would just be coming around hammering them. So we knew we couldn't put that out because the plastic is very, very brittle. So we then, yeah, we have to cast in a much strong material. So that's why the mould making exists. So mould making allows you to make copies of an object in a different material other than what it was originally. So this allows us to make the pattern. The mould allows us to make a thing that will last in the gallery for, you know, for however long. Coming along. Now, coming over here. Ahh the megalodon. So, 3D printing is all well and good, we 3D printed large scale dinosaurs. We have 3D printed tiny, tiny insects and all kinds of animals and creatures. The megalodon came a different way because it was such a big mass. 3D printing was just impractical, and it would have cost way too much and taken way too long. So what we also have at our disposal at the studio is a big, five axis CNC robot arm. So that 3D file, which, again, so, what's his name? Dr Mikael. Mikael Siversson. He's the foremost expert on the megalodon here in WA. And he consulted, again, the same paleo artist in Russia to do a 3D. You can read it on the graphic on the wall there, the graphic of the Megalodon, which we were provided to make a physical model of. And you can see there. So he based, I think he got like fossils, tooth fossils, he had them scanned and sent to the artist and the artist and built around those teeth. So it's about as accurate as it can to, you know, proportionately the teeth. So the teeth informed the shape of the head, which informed like, you know, the overall scale. So, because it's such a big mass 3D printing is impractical, so what we then do is we take that 3D file and send it to our CNC axis, um, five axis CNC arm. So, this is polystyrene, and what the arm does is we take blocks of polystyrene, put it in front of the arm, program it say, oh, I want to cut the pieces, and it cuts it out. So it sort of carves it away, kind of like a person, but it uses a big motor on the end with a milling bit. Um the pieces are only so big, so you can see it's in sections, so we then have to glue it all together. Then, yeah. As it glues together, it slowly takes form. Here’s Richard here putting epoxy resin inside the mouth. So it's one of those, like, small little cheats. Like, because once it's fully assembled, you can see it's really tricky to work in the mouth. So what we were doing here is we were sort of getting the mouth romanced to a certain point, so it's less work later on. So he's just putting resin, putting natural pigments in, trying to make it really fleshy and look lifelike. And then coming along. Again, it's a simple matter of, so it seem simple now, but essentially, we assemble it all together, refine all the seams, and then start through the artwork of painting it up. I think we had like three different, all three of our painters working on this at the same time. One guys doing scars. One person was doing the inner the mouth. Rhett's, I think he’s just behind the shark there, he was doing a lot of the paint job. And so it was just a lot of collaborative effort within painters, trying to make something as close to the artwork as they can, but also something that sits really, really real and natural when it's in the gallery or in front of you. So as you come along here. Yep. So the next stage, after all that painting, was putting the teeth in. So all those teeth, so those weren't cut out of foam, those were SLA printed on a machine that I was talking about before. I think, there was a lot of teeth, so we had to, like, make sure each one was numbered, each one was painted correctly, each one is inserted into the right spot. We dropped a lot of teeth down the mouth, and it was it was bound to happen. So you had to, like, reach in with, like, a tool to grab it out. So you can see there. Yeah. So even with the eye. So the eye was made separate and then, you know, attached later. And then after that, yeah. So it was a very... So after we put the teeth in, never before have I noticed how many bridges, low cables. It was such a nerve racking experience getting this from Osborne Park to the museum because we were driving behind. I just watching it. And just like, just holding our breath each time a bridge came by. But thankfully, yeah, it made it here okay. And we were able to, yeah, we were able to put it in just fine. And it being out of foam, it was actually very, very, very light. So because it's, it's essentially like polystyrene, you can just pick it up. Like, maybe like five guys picked it up, placed it into the cabinetry and it was just done.
So that's like one of the really big, I guess, benefits of using each material to its strength, Even with the, with the 3D printed dinosaurs, they're not solid. They're all printed hollow, which allows you to get a lot of like, they’re really light weight. So especially if you're trying to hang it over people's heads, you don't want this huge weight dangling over people. By printing them hollow, essentially, you're hanging a piece of metal and that's like some light plastic glued to it. So it's one of those things where, just depending on what each thing is doing we just got to pick the right pathway to make getting it the best result, but through the most efficient pipeline of fabrication. So that's all our models.
So whilst we do make models as model makers, we also do some of the, I guess, dioramas and themed elements that you see all around the gallery. One of them is this stylised Kimberley rock wall feature. Just there in Relics and Refugees. So if we come across here. So, I think the cabinetry group was called Design Craft and they were responsible for all the woodwork, joinery, cabinetry, all the stuff that you see, all these, all the stuff that you see here. Their job was to install all that. They had already built this here in the museum. And our job was to make this, essentially this is what it looked like before all that was brought in. We had to make that look like that over there with all the rocks on it. So what we asked them to do is could you give us the 1 to 1 blueprints that you were going to build here so we could essentially make a dummy version and build a mock copy of this display so we know it fits. Because we had to essentially, we had to make it offsite. Take all the pieces and make sure it fit. And that was a nightmare to even fathom, to think like, oh, if we get the dimensions right, it will be fine. But we knew that like, oh, it could be out and then it all falls apart. So the best option was we got the files from Design Craft and essentially built a 1 to 1 replica of that zone in our workshop. From there we had our rock sculptor JP, make a special mix of concrete and whole different additives, allowing us to essentially just carve fake rocks. Which is a thing we've done for a lot of places, we've done for the zoo. We've done, yeah, for a whole bunch of customers and playgrounds as well. So it's just another way to use our skillset to make something really special. And you can see here, JP here again, all these pieces at the sort of like I guess fault and rock lines have these, you see the little plastic there, those little bond breakers. So as he was sculpting it, he was putting the plastic in between each piece, so when he was done sculpting it, it separates off. Sort of like releases like a mould. So this is like, well, it looks seamless, but essentially it's like, you know, 60 different pieces that all came together and fit perfectly. Hence why we need to make a copy somewhere else to check that it actually did work and it could actually come back together. Yeah, it was a big, big puzzle. And also it's another thing trying to carve things where like it didn't lock itself. So you have to carve things so, you know, that wouldn't lock that other piece in. Yeah, but in the end, yeah, after a lot of a lot of work, they all came off, we were able to then take them all down to the studio, or out of the studio, down to the museum. All, I've forgotten how many pieces, but it's like it was a fair few. All of them had a custom mounting system on the back of them. So when we lined it up with where it had to go it sort of clips in. Coming across. Yeah, you can see it here. So that same, yeah, because we already like pretty much we built it at the studio remotely, put it all together, we took it all off and then put it all back together in the dummy studio. Oh, in the dummy layout, making sure it all fits. After we got the confirmation, okay, we've done it a few times, it works. We could take it back with enough certainty that this all fit. However, when we came here, turns out that some of the floor was a bit uneven, which really threw out a lot of the work we had done. But it was all right because, you know, we just come in with like chisels and sort of made a work. So underneath there we had a little clamp we had to do. But you can see here, so all the pieces like that slots in there, that slots around that, again, there was all these like built. So that's where those insects go. And then just yeah, you can see eventually as it slides itself in all the seams sort of hide all the joints, making it look like almost one cohesive space.
And then coming across. And that same thing with rock solving applies to other things in the gallery. So we've got a big termite mound over there. There's me, I think. So this is the Welshpool facility for the museum where they had a real, that's a real termite mound. And the brief was, we want this termite mound in the gallery, but they can't put that one in because it's a real termite mound and it will break off and it weighs, like, six tons. So our thing was we had to make a fake termite mound and be able to put into the gallery and it had to do a very specific thing, I think. So it had to like line up with this, you can see there's like a curved cabinetry element. So it had all these like requirements that you couldn't just place this in and make it work. It had to do a very specific thing and also had to have like a chamber for kids to climb in and look through and same like they can look at the termite, the termite model that's in there. So, what you see, that pink square there is silicon. So what I've done is I've gone there with the same stuff that we've made moulds with, but I've, I brushed it on to the termite mound itself. And on there I was able to take sort of essentially a silicon stamp, which I could then pour stuff into to make a copy of the texture. So whilst we couldn't mould the whole thing, we were just taking that texture so we have an idea of like what it is we're trying to match. Because we couldn't just take this home, back to the workshop with us. So once we had that texture on hand, and we knew when we were doing little colour matches with different materials, we then had to make the form. This started off as, I guess, a very small-scale maquette. So, so a lot of what we do has a lot of like, there's a lot of approvals. So we don’t just make things off the fly , we have to, like, make a scale model which then had to get approved. Then we can do workshop drawings, and from there it gets approved by another person.
To the point where this is what you're getting, because this had to fit a very specific way in that gallery around the cabinetry. So we need to know when we place it in it fits and does what it needs to.
So here's Marion taking that. So we had a scale model. And what we then did was we sliced it up into a series of, I guess, like pizza slices, and then had those scaled up on a big sheet of paper. So when you put it together at a larger scale, it becomes, you know, that same thing but bigger. Kind of like what the 3D printer is doing. However, it was faster for us to do this by hand than it was to do, to try and get a 3D scan or try and use the CNC arm. Because I think at the time it was busy cutting the shark so we couldn’t, I think we were at capacity for that. But with this, yeah, it was just faster to just cut them by hand and just build it. This is pretty much the under form of the termite mound, to which we then added a concrete mix. So here's JP again. So what he's done is, we have a special concrete mix with different additives that allows us to sort of put a, to scree it onto the surface. And it has a really, because of all the additives, it has a nice hold. And you can then carve into it for like a, I guess, like a couple hours after it's been put on. That's just the scratch coat. So that's not the final, the final object. From there we can then, I think, we did try a couple things with that mould that I took. We did try casting in, making stands, putting it on and it just didn't look right. And then after a lot of thinking and like, like watching a lot of, like, documentaries on what termites do when they build their mounds, which is, involves them sort of essentially spitting on to it, like just sort of forming these shapes. We decided to go with the piping bag method, where we made the coloured match concrete, put into a piping bag, and then you just started, like, squeezing it out, building it like nodule by nodule. Using, still using that stamp, sort of guiding you how it sort of all builds together. But as we go through, you can see, yeah, it looks pretty much like a real termite mound. But you can see this is the cabinetry. It had to slot into this thing that built around then locks it in, because I think there's like an AI element where kids can hold an iPad and can see sort of the, the critters walking around. So, and that was also, again, that didn't weigh six ton. That was like, maybe, well just under one. But enough that like we could forklift it here and get it installed into the gallery. Which was again, which was the, the brief of the job.
Coming across. And we got the Gogo diorama. So around the side there, we also had to make, what is it, I think it was like 12 or 13 different Devonian fish species. So there's, like, all these sort of prehistoric fish that they found all these fossils in a cave. And from them, yeah, they decided like fish from all this, like just this different time. We had to make the diorama that they went in. So again, this is what I mean about making a scale model. Here’s Rhett making a smaller tabletop version of what it is we're going to make, what we're going to provide the museum, which then got approved. So, yeah, he was just, like, playing around with different shapes. That's just foam that he's carved and, you know artwork done with paint to make it look somewhat realistic. And then come across. There's it scaled up. So again, he took that original scale model. We then, again, were able to, like, cut it into slices, transfer it onto larger pieces of paper, and then build essentially the larger version of the exact same thing that the museum and the customer said yes to. So here it is, the diorama coming. It's coming into form. You can see here some of the cutouts of the fish, because at the time we were making this, we had done the 3D sculptures of the fish, but we hadn't printed them out yet. So to get an idea of like where things went, we sort of made these like dummies. So we sort of propped them in and took a photo and it’s like, okay, this big fish sort of hangs here, this one goes here. And then coming along, yeah. Here you can see Dan, the owner of the business, inside this diorama installing the fish. The thing with this diorama is the door that we were given is like this tiny door here. If you look there, this diorama is huge. [Some audio missing] Into, like, 3 or 4 different pieces and slide it in through those doors and not scratch the glass. That was terrifying, because, yeah, if you scratch the glass you then have to replace it. And the builder who was fitting out the gallery, everyone's like sort of checking, oh, there's a scratch here, that has to be replaced. There's the there's a nick here, this has to replaced. So we were like, oh, I sure hope we don't like scratch the clean glass with all this sand we're tracking in. So yeah, so that was one thing. We had this one tiny door. So all the pieces that we were making for this, this diorama element had to fit through this door. So we had to cut it in a strategic way. And also, if you ever tried to like, put a, bring a sofa into your house, how much of a nightmare it is. Try and think that like that but worse. Because we couldn't touch anything, so we had to do so many, like I guess, mock runs of us twisting in a very specific way so it lands and doesn't scratch anything else that's very, very expensive. And then, yeah, after we put the diorama in, we made the seams all good by sprinkling the, I guess, the, the coral sand and all the different shells and different things that they asked for the diorama to have. Then after that, the models that we printed and made prior, we could then, because we made all the ones that are in there as well, we put them in, hung them, and the diorama looks, yeah, really, really nice. Like an undersea location.
Coming across here. The mangroves diorama. So that was the Gogo diorama. There's another one here just around, in the Leeuwin Journey of, of a mangrove, just a mangrove diorama with... There's specifically, there's three, there's three mangrove species and a whole bunch of mangrove creatures. Like, there's like a small alligator, a whole bunch of crabs, and some birds as well. So what happened was the museum, the old museum, had a previous diorama, and they wanted us to integrate that into this new one. So, Yeah. So we went to the museum, picked up the old one, and essentially we got the green light to cut it up. So we cut up, so you can see it here, that's one of the old pieces and that's another one. From there we had to then make its own custom base, because again, the designer of the museum had a very specific shape that they wanted to fit in. So we had to essentially splice these trees or, these trees into this new shape. So you can see here we've made this big sort of foam base that essentially is like the height of, this is like the max height of the diorama, because this bottom bit on the right has a whole sort of like underwater section. So it goes from like this high land point down into the water. And then yeah, so previously and as you can see in the old one. Well, so it had all these like little mangrove sprouts, there was like maybe like 200 of them. We just had to pull them all out. But we didn't throw them away because we had to integrate them back into the, into the splay. You can also see here there's an old mud crab that we took out of the old diorama, and we sort of spliced that in as well. They had all these old leaves, so it was very, very cool. So this is a fake, this is a fake model that they already had on hand, and we're just trying to give it new life in, in the gallery that we were provided. Here's me and Marick, another one of our fabricators. So after we had the tree sort of grafted into this new platform, we then had to put, I guess, a kind of plaster material to sort of make it all cohesive and seem as one surface. And you can see there the starting of those mangrove shoots sort of being plumbed back in and slowly like, yeah, trying to tie it all together to make it look like a real, essentially a real, a real, real, real set. And then here's it taking more form. You can see, yeah, so this is what I mean about the sloping bit. So this side here allows for a piece of acrylic to come in. So it looks like it's like a water line. So there's like some fish at the bottom. That tree on the side there required us, so we had to make, so whilst there were these two trees that we had from the museum prior, there's one that didn't exist. So we had to start from scratch. I think it's like a kapok mangrove. You can see there's a reference photo. So using the reference photo, we then had to like, so that wasn't 3D printed. That was just us taking like, I think was like an old cardboard tube, using it for the stem and then essentially getting silicon moulds of branches and bark from similar plant species. And, and what we could do, was essentially making stamps. And you put the material into the silicon mould and you can sort of squish it and wrap it around each of these base forms, and it sort of transfers off. So that's how you sort of get that bark texture and you’re sort of just building the tree as you go, going back and forth, moving up and down. I think, yeah, there was a lot of discussion about trying to get the colour right. You can see, oh, in the back there you can see. Also, there's the scale model. So again, a lot of what we do starts from, still the model is sort of the guiding light for a lot of the things we do, just like the 3D files that we had before. Those guide what, now this is what we want. They’re supposed to like give them a vague interpretation, like when the museum engage us, they don't get like our interpretation of what that object is. I want this exact fish. I want it to look exactly like this. I want this exact dinosaur, that exact shark. It has to look exactly this way. It has to be this big. And so all the models sort of drive all of our decisions to make that object.
Same here, even with this. So with the scale smaller model, we made a small one, just to get an idea. It's also to help us in the team to get an idea of what it is we actually wanted to make. As opposed, to like, just making it on the fly, which it just wasn't going to happen. Because like with the Gogo diorama, we also had to make it fit through a very, very tiny door. Which is again, you can see how big this thing is. It was very, very wide and the door was probably, like, the size of that, just that middle section alone. It was a nightmare. Trying to get that, you can see there, the slices that we've done. So the back comes off, the front slides away. It's was just, really just a big, big hassle trying to get it in and not get not scratch the glass. But in the end, it looks really good. I think, Kirsten and the team here, after we put it in, they were then able to take all the their specimens, all the taxidermy, little shells. I think they had like little crustaceans, little shells. And they populated it out. And it looks really, really mint. But yeah, so that's again another thing that our studio does, ranging from, making the models itself as well as like, different like, I guess theme finishes and scenic elements.
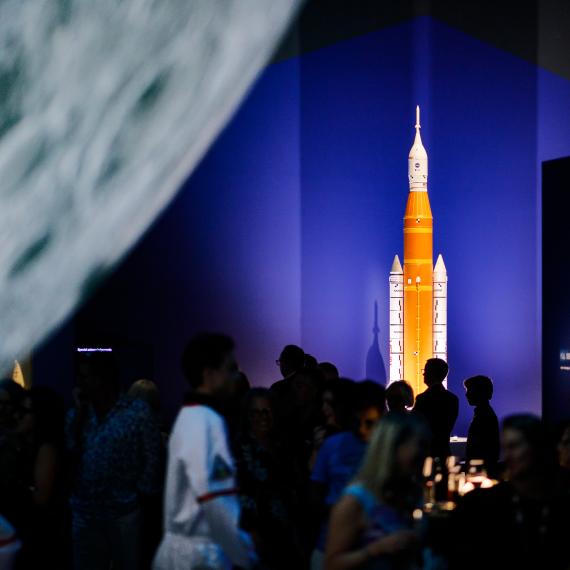
Coming along and yeah, there you can see it there as it's taking shape, when it's all sort of more cohesive together. All the spikes are in there. We had some of the shells leftover. Then we started like gluing them in, trying to make the scene sort of like play itself out. The leaves are actually really cool. So the leaves were like a vacu form, so like a little plastic. Yeah, so essentially pieces of plastic that had been put on ,made a special way, and you sort of like attach them to the branches which is all.... I’m pretty sure, I can’t, pretty sure these two were real and the rest was all just glued on to it to make it, you know, just adding a whole bunch of realistic effects. And then, yeah, so that's the mangrove diorama. On top of that, since the museum, we've done a couple of things. So if you've been to the moon exhibition in the special gallery, we made this rocket recently. This is the Artemis Rocket, this is really cool. It did come about the same way with instead of making a dinosaur, we did take those 3D files and use it to make a rocket. So we had 3D files from NASA, which is a thing you can get, and we use that on our 3D printer, print all the pieces, get the decals, get them scaled. And it, still again, looks really, really cool at the end of the gallery.
And another thing we've done for WA recently was the Discovering Ancient Egypt exhibition. I don't know if you all saw that. We had this sort of copy of a temple entrance from Holland or the Netherlands, sorry. The scope was it had to disassemble, oh one it had to be very lightweight that people could install it easily. But also it had to disassemble because I think it was between the WA Museum, Queensland Museum and Canberra. They sort of had a joint deal where they were going to share that exhibition as it travels around the country. So we had to make something that looked pretty decent because it was, it was it was going to be like a projection canvas that... You'll see on the next one. But essentially it was more or less a projection canvas. Not so much just a real.... Like it's not meant to trick you that it's stone, but we did, work it up to make it look very, very, very, like, very realistic. But you can see here same thing, the CNN arm took the 3D scan of the actual temple. Yeah, we took a 3D scan of the actual temple provided to us from the Netherlands, which we then cut off into pieces that the machine cut out. Whilst its polystyrene is still very soft, and we knew that because this is accessible for people walking by that people were going to probably climb on it or kick it. We then had it sprayed with a plastic elastomer. So this is Peter Tate from... he normally sprays like chicken coops and or like barns and he does insulation with his special gun. What he's doing is spraying this hard rubber essentially to make it super durable, but still making it very, very lightweight. That's what we could then paint. And yeah, there's us installing it in the gallery downstairs. And essentially it was super light and just sort of slots together, and just holds itself onto the wall, which is really, really neat. And you can see here, yeah, this is after they get it as a projection surface. It was really, really cool to see.
And then coming, I think we're nearing our end, ahh, we are at the end. So, yeah, pretty much that that was an overview of just some of the things that we made here in the gallery. Hopefully that was very informative. Happy to take questions if you've got anything you'd like to know about. If there’s time?
MC: Just before we take questions, should we show our appreciation for that journey through? [Applause] Wonderful, does anyone have a question that would like to ask?
Audience Question: Hi. I was just wondering what pathway you took to get to this job. Like if you did a certain uni course?
JK: Oh, no, I, I get asked this a lot. There's no direct pathway. So I would say, for instance, in my case, I went to school for engineering, and yet here I am making dinosaurs. So there's no, I guess, clean pathway. Like, I guess some people would say like, oh, you're going down like making props and art for, like... I think for us is it's just about, we don't see ourselves as arts per se, we’re just people who who I guess... Ahh, it’s such a weird thing because like, I'll maybe I'll explain from my, like it's my journey and hopefully that helps. I went to school for engineering and then what happened was there was a traveling show called Walking with Dinosaurs, where they had giant dinosaurs in the arena, and you could, like, go watch them. And that was like, super cool. And at the time, they had a behind the scenes featurette on how they made those dinosaurs. And like that really, really stuck with me whilst I was at uni. And I saw that and was like, well, that's really, really cool. And somehow I just sort of gravitated towards that. Not, not having done any art, I didn't know how to do any of that, just that it was something that really drew me as a cool thing to explore. And thankfully I found Dan, who I still work with to this day, who had a really good idea of what he wanted to do with his model making, I guess endeavour. And we knew that we wanted to make these things, for museums and for builders and for playgrounds and push what could be done. And for me, like, yeah, I think like there's no clean direct path. Like we have, ahh such a random thing. Like, so Marek, one of the key fabricators on this job, he used to spray concrete in Finland. But he came to Australia and he's like, oh he's kind of had an interest in like 3D modelling and doing fabrication and stuff. He’s like, oh, I could get my head around making this. And the same with Marion, one of the women you saw in the previous slides, the one who hand placed each hair on that wasp. She had no fabrication experience. She was an artist. She's a caricature artist based in Perth, she does amazing paintings and other drawings. She had never made anything in her life, but we were able to teach her how to like, do the things that the studio needed. So, in terms of pathways, I'm terrible at that, but I think it's just if you have a willingness to be able to, like, follow instructions and understand, like what you're doing. Pretty much like having a keen eye for detail I guess helps to a degree. But at the end of the day our whole thing is, there's no clean direct line. Sorry, that's a terrible answer to your question, but, like, essentially, yeah, people come from all directions. I think a lot of the inspiration for what we do as a studio comes from the world of special effects. So, if you've ever seen Jurassic Park, Terminator, all these like famous monster movies, they were all built by people in effects studios in LA during the 80s and early 90s. And all those guys were just like, they just loved what they were doing and they were making dinosaurs. And I think, like, it's about learning how to use like the materials, making foam, doing sculpture. I think as a job it's very polymathic. You're pulling on a whole bunch of different things. It's not just one thing. It just happens to be that being able to get across a whole bunch of things allows you to make these objects I think. So yeah sorry there's no like, please do this TAFE course, you'll be fine. Sorry.
Audience Question: What do you reckon is the most tedious part of the entire, like, making process?
JK: Oh, it's the painting bit. I don't do the painting, but it's the most painful part, because a lot of these things, as beautiful as they are, that's like the seventh time that we've done it. The customer doesn't see that. You guys don't see it. All you see is a beautiful object at the end. Rhett, who had like this this... So this is at the Queensland Museum, it’s a gorgeous thing. It’s like seven meters tall. He painted this like seven times because it just kept looking wrong and I like I have no patience for that because I'm not a painter. Like, I could just sense like, oh man, it's super, super annoying because, like, it takes a lot of, it's about understanding, like, oh, I know it's about understanding light and compositions, all these things that I have, again, I can imagine it's very, very frustrating. For me I do a lot of the 3D stuff, a lot of fabrication stuff, and that's very straightforward. Like this arm goes here, like, that's it. I'm happy with that. And the cleaning and making that seam go away, that's straight forward. You know doing all the design work, every bit up until painting, great. That painting bit, ahh just nightmare. And then the after bit with installing it, like those are all challenges that you can solve because, whilst a lot of the people in the studio, they all have like, again, it's a very subjective. Like I think this looks better, no, I think that. So it's like, so everyone's still friends at the end of it all, it's just part of the creative journey unfortunately.
Audience Question: What sort of things did you have go wrong in the process of making these?
JK: Let's see, things that go wrong?
Audience comment: That you can tell us about. [laughter]
JK: Well okay, no, no. A big part of this job and like I guess with life, failures inevitable and you’ve just got to learn how to buffer yourself and push through it. With the printers, a lot of them, a lot of the time, things can happen because it's still a physical process. The printer can crash setting us back a considerable amount of time. Like something like that piece of that dinosaur head over there, that piece takes about, I don’t know, I think it was like six days to make. And if it crashes on day four, you have to start over. Six days, that's pushing you back and like, that's a nightmare. Sometimes it's just about easy mistakes. Like we have a lot of chemicals. So, with the silicon, the resins, all that usually has a part B. You mix part A with part B and it goes off. Sometimes, and what happened on some of these things, someone forgot to mix the part B and it never went off. So, you’re just left with this resin that's just never going to dry, like never. So you have to, like, scrape it all off and start over. I think those are probably like the biggest things. Like we've not dropped, thankfully, we've not dropped anything or had any sort of catastrophic failure in that sense. With a lot of the things that are hanging, again, we get them certified by an engineer. So we had drawings made up and we sent them to the engineer, and the engineer had, the structural engineer who does heaps, I think he does the stadium and all kinds of like super mega projects. They will look at it and say yes, you can hang this dinosaur if you make it this way and it will not fall over. So that's kind of what we do as a studio, because we're not like, oh she'll be right kind of thing. Because, yeah, it's over people's heads in public. Trying to think like, I think like the most, not through our own volition, sometimes it's just things out of your control. Like I said, when we brought those rock pieces for that thing, the floor was out. It was out actually, everywhere in this gallery. It was a nightmare for the installers because they would have they made all this, all the wood stuff you see around it was made, I think, over east, brought over in a container and installed. That's great when the floor is flat, but if the floor is like slanted, all the flat things you've made now don't work. Which is what happened with a lot of that rock stuff. So we then had to go in and chip, you know, each of the bottoms out and like sort of make it so it then fit. But again, it's not catastrophic, just an unforeseen hiccup along the way.
MC: Probably, yeah, our final question over here.
Audience Question: Jason, do you have a favourite piece that you guys worked on in the gallery? And also added to that, which one were you glad to see the back of?
JK: Ohhh, in this gallery, I think, I think deep down, as someone who really loves this, my dream was always to make dinosaurs. It did take a long... So it's that therapod in the corner. That's probably my number one favourite because it just speaks to one, like oh, this is the dream. To be able to do this, mind you for the studio, we didn't always do museum things. That was a bit before the museum, where we're just doing a whole bunch of different projects for, you know, for construction companies, for the zoo. We did dabble a little bit with the museum, but yeah, the Boola Bardip fitout was the first big model endeavour for us as a studio. And it really pushed us on to the next level to the point where, yeah, now we're doing stuff. Well since then we've done stuff for the Sydney Museum, the Queensland Museum. Currently we're looking at stuff for Melbourne Museum. So it's things that, and it's again, all those three places are all places not here. Which is wild that us in in the middle of, like far, far west in Perth, are able to take out jobs for those larger places. In terms of what I'm glad to see the back of, it's like I don't know, I think at the end of the day like because we made so many things, we were just like trying to push them all out the door. And we had like very tight deadlines. I think I was happy to see them all go. But, yeah, if we had a chance to make it again, if we had another opportunity, we'd do it all again I think as a studio. Yeah.
MC: Fabulous. So thank you so much Jason. And we really appreciate your passion for what you're doing, and hearing about the success of a local small business. Well perhaps not so small now, which is which is great. So can we please show our appreciation for Jason once again?
[Recording] Thanks for listening to the talks archive brought to you by the Western Australian Museum Boola Bardip. To listen to other episodes, go to visit.museum.wa.gov.au/episodes/conversation where you can hear a range of talks and conversations. The talks archive is recorded on Whadjuk Nyoongar Boodjar. The Western Australian Museum acknowledges and respects the traditional owners of their ancestral lands, waters and skies.
More Episodes
Gender-related violence isn’t talked about often enough, but it happens in WA. Often, conversations centre on victims and perpetrators, warning signs and cycles, breaking points and crises. But what happens next? How do we move toward recovery, reconciliation, and positive change?
We know ferns have existed on Earth for millions of years, but just how closely do ancient ferns resemble modern ones?
By drawing on First Nations knowledge systems, cultural practices, and research methods, this presentation will showcase how climate adaptation and mitigation strategies that respect and integrate Indigenous knowledges and practices can help sustain well being.
Have you ever wondered what it is like working with fossils every day? Helen Ryan from the WA Museum shares her work in discovering, uncovering, preparing and preserving ancient life.
Hear from Dr Amanda Ash from Murdoch University’s School of Medical, Molecular and Forensic Sciences as she delves into the complexity of parasites and their importance.
Join us for a journey into the ancient world with Dr José Galán, a renowned Spanish Egyptologist and director of the Djehuty Project.
Discover what we can observe about the Moon, learn about our current knowledge, and understand the importance of returning to its surface!
Discover the elusive Night Parrot at WA Museum Boola Bardip! Join us for an exclusive panel discussion with experts Penny Olsen, Allan Burbidge and Rob Davis.
Join Museum experts Jake Newman-Martin and Linette Umbrello as they take us on a mammalian adventure of the minute kind, from tiny marsupials to giant megafauna.
Discover the remarkable story of Wayne Bergmann, a Nyikina man and Kimberley leader who has dedicated his life to his community, in this moving memoir of living between two cultures.
Celebrate Perth Design Week with a robust panel discussion focusing on design and business.
Talk series hosted by Geoff Hutchison that explores who our young selves were and what became of them. This week hear from Sabrina Hahn.
Navigating the delicate balance between the preservation of the Conservation Estate and our cherished and loyal feline companions is both a challenge and a responsibility.
How much will we look to the language of activism in finding the way towards reconciliation in Australia?
